
I recently did a weekend course in French polishing and upholstery at the Barras hosted by the Glasgow Furniture Collective (GFC).
If you are looking to dabble in upholstery, I absolutely suggest you give this course a go.
It's run by Nicola Williams, one of the founders of GFC - and this lassie knows what she’s talking about when it comes to upholstery.

She studied furniture restoration at the City of Glasgow College and has since taught several of her own upholstery classes.
Nicola has been working with various organisations including the Rags-to Riches programme - an upcycling project which provides workspace and educational programmes including those looking to get back into work.
Like myself she’s a fan of zero waste and enjoys hanging about charity shops for new projects. A burd proper after my own heart. Love you Nicola!
The course was over two days with only four pupils and Nicola herself.
'UNREAL'
It was an introduction to the basics of French polishing and upholstery but the amount we did over the two days was unreal.
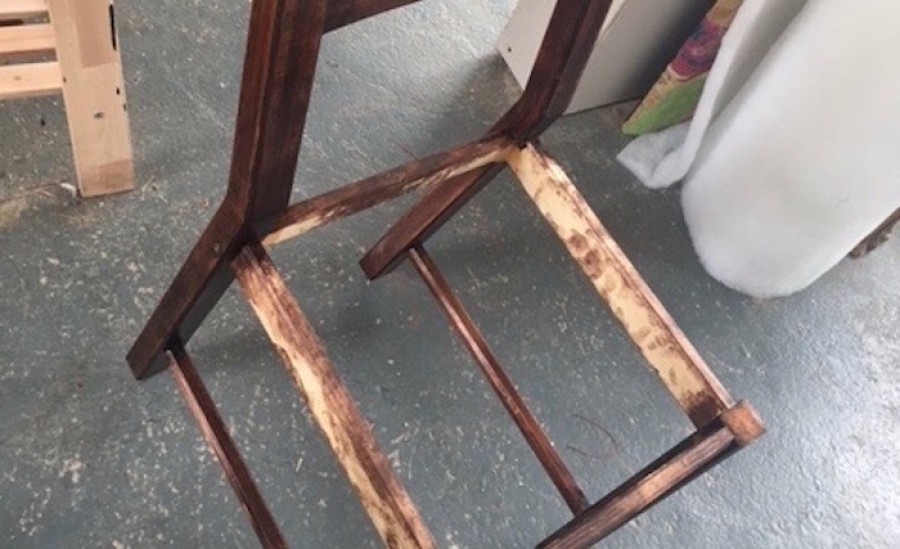
We started each with a timber chair frame. The aim was to learn how to French polish and upholster a chair that we could take home.
First of all, we sanded the chair to get rid of any grit and make it as smooth as it could go prior to staining.
Then we stained it with whatever colour we wanted using an oil stain.
We were asked to bring material for the chair and I opted for a McReddy Tarten. (I made that up. I’m not sure there is a McReddy tartan, but it was a reddy tartan so it’ll do.)
The stain I used was Golden Oak and it came out with a McReddy tinge.
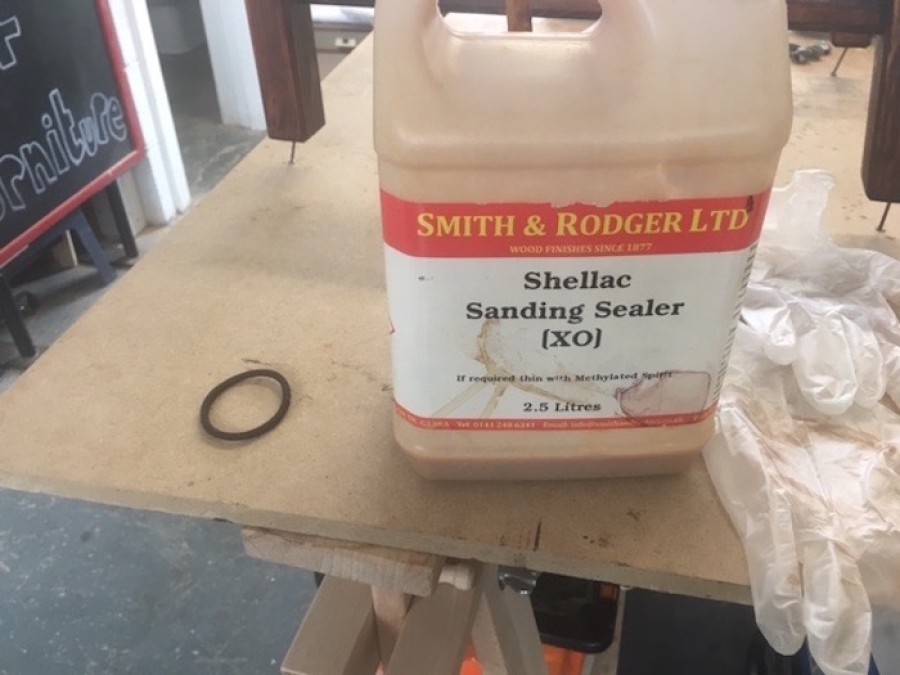
When it had dried we applied shellac sanding sealer to prep before polishing.
The sealer provides a flat surface so that the shellac polish doesn’t soak into the wood when French polishing.
After the shellac is on and dried, give it a very light sand (usually called denibbing at this stage).
Then with a squirrel hair brush, I polished it with button polish.
It’s more of the technique itself what makes it a French polish.
Button polish gives you a nice rich patina to the wood as well as a protective coating.
Repeat this process four or five times (polish, dry, denibbing), until you have the desired effect.
It’s highly effective when done properly. It gives wood an older, more expensive looking finish which is so shiny I can nearly see my big moon face in it.

The next stage was making the seats for our chairs the good old traditional way. I loved this bit.
We learned how to web a chair using the traditional method.
We did this using a web stretcher, which was quite fiddly but fun after you got the hang of it.
We then covered the webbing with hessian and sewed bridle ties (essentially a row of back stitched loops) in the shape of a big 5 on the base hessian.
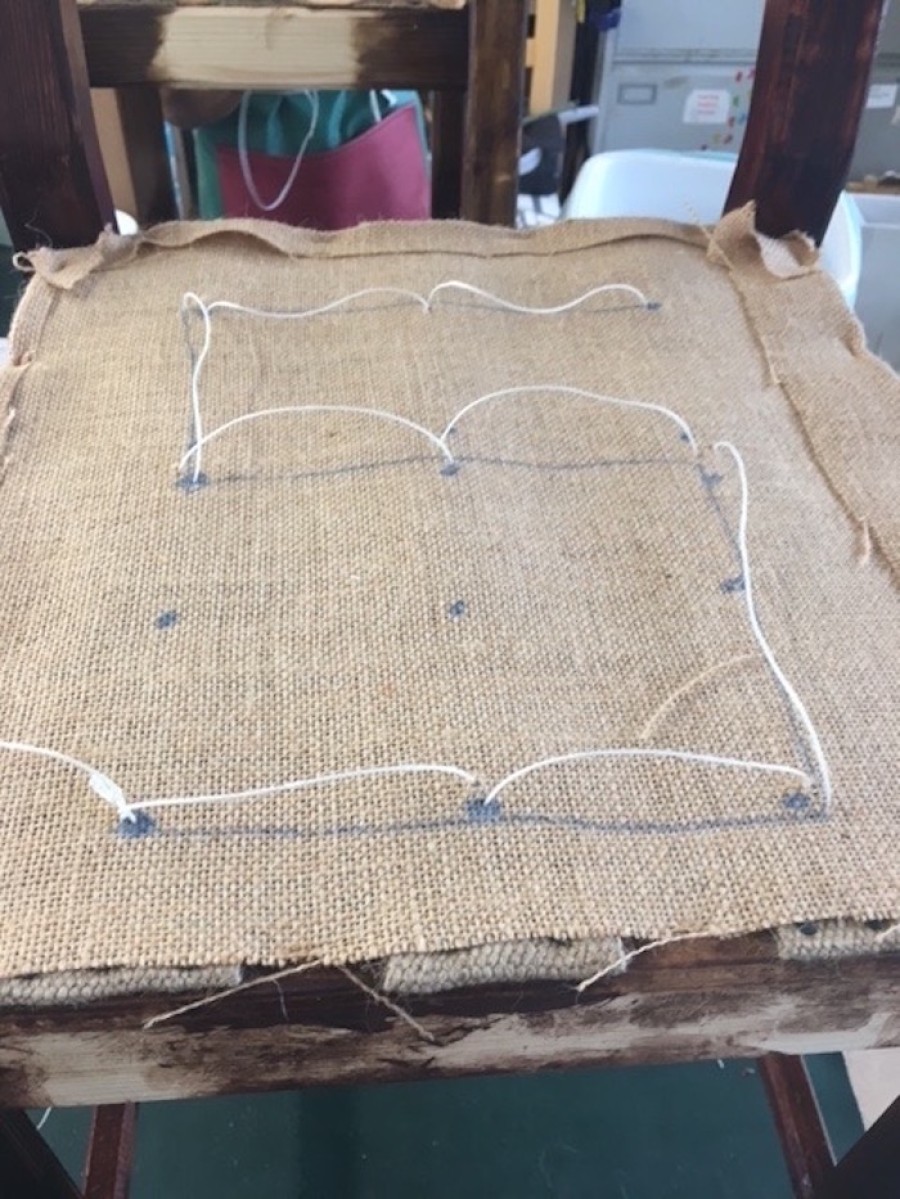
The string had to be left quite loose so we could stuff the padding under it.
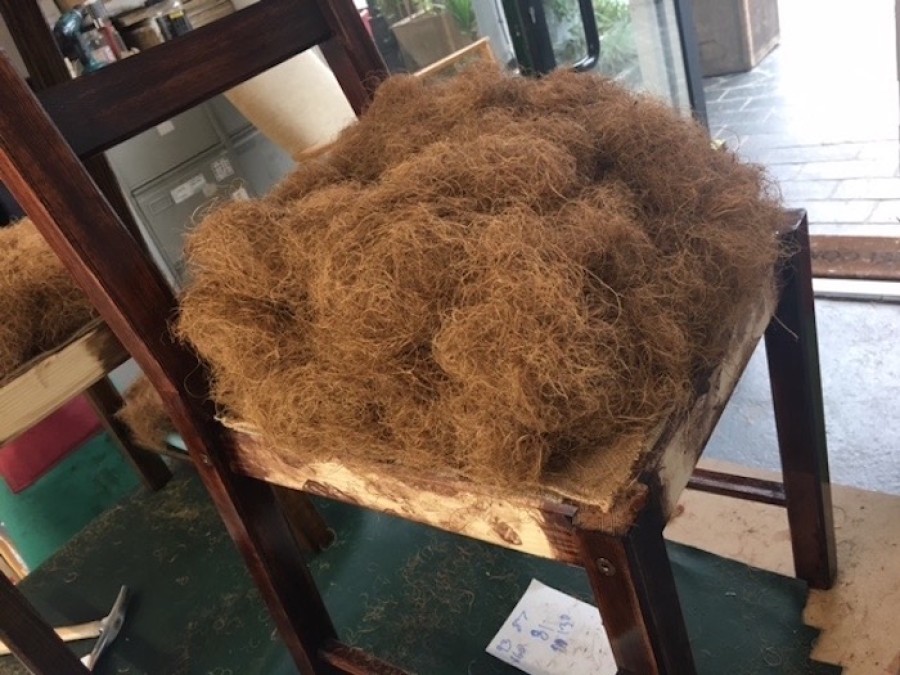
The padding back in the day was horse hair, but it’s really expensive so for practising reasons we used coconut fibre which does the exact same job.
When we had our ideal shape we covered it again with calico material and tacked it on to the side of the chair perfecting the shape even more.
Next we cut wadding to shape and attached that to the chair frame over our padding. Our bums have never been so lucky.
After that the final stage was fixing our chosen material on.
When we were done we slapped ourselves on the back for a job well done.

If you want to try it please get in touch with Nicola at the Glasgow Furniture Collective. Visit www.glasgowfurniturecollective.co.uk.
Till next time, Junklovers x
* You can purchase items directly from Becky or you can ask her questions about upcycling via her Facebook page The JunkTrunk Glasgow or instagram page